Halloween Mummy Cookies have been a staple in my kitchen for years, especially when that crisp autumn air signals spooky season is just around the corner. I remember the first time I tried making them with my niece; her eyes lit up with excitement as we transformed simple cookies into adorable little mummies. The smell of warm chocolate chip cookies baking, combined with the sweet vanilla frosting, always fills our home with a festive cheer. These aren’t just any cookies; they’re a fun, hands-on activity that results in the most charming and delicious treats. If you’re looking for an easy mummy cookies for Halloween project that’s sure to delight everyone, you’ve come to the right place. Let’s get baking!
Why You’ll Love This Halloween Mummy Cookies Recipe
These cookies are more than just a treat; they’re an experience! Here’s why you’ll want to add them to your Halloween baking list:
- Super Easy to Make: Even if you’re new to baking, you’ll find these cookies incredibly straightforward.
- Kid-Friendly Fun: Get the little ones involved! They’ll adore helping with the decorating – it’s a fantastic way to teach them how to make mummy cookies.
- Deliciously Spooky: A classic chocolate chip cookie base topped with creamy vanilla frosting and those essential candy eyes makes for a perfectly festive and tasty treat.
- Quick Preparation: You can whip up a batch of these charming cookies without spending all day in the kitchen.
- Versatile Decorating: Whether you use a piping bag or a fork, you can easily create unique mummy designs.
- Impressive Results: They look so professional, but truly, this is how to make mummy cookies that will wow your guests.
- Perfect for Parties: They’re a guaranteed hit at any Halloween party or bake sale.
Ingredients for Halloween Mummy Cookies
Gather these simple ingredients to create your spooky, delicious Halloween treats. I love that this recipe uses pantry staples, making it easy to whip up a batch whenever the craving strikes.
- 1 cup unsalted butter, softened – This ensures a creamy base for our cookies.
- 3/4 cup granulated sugar – For sweetness and structure.
- 3/4 cup packed brown sugar – Adds moisture and a lovely caramel note.
- 2 large eggs – Room temperature eggs incorporate better into the dough.
- 2 teaspoons vanilla extract – Essential for that classic cookie flavor.
- 3 cups all-purpose flour – The backbone of our cookie dough.
- 1 teaspoon baking soda – Helps the cookies rise and spread.
- 1/2 teaspoon salt – Balances the sweetness and enhances flavor.
- 1 cup chocolate chips – Because what’s a good cookie without chocolate?
- 1 cup powdered sugar – For a smooth, sweet frosting base.
- 1/4 cup milk – To achieve the perfect frosting consistency.
- 1/2 teaspoon vanilla extract – For an extra hint of vanilla in the frosting.
- Candy eyes – These are key for our mummy cookies with candy eyes, giving them their signature spooky look!
How to Make Halloween Mummy Cookies
Let’s get down to the fun part – turning these simple ingredients into spooky, adorable mummy cookies! It’s a process that’s as enjoyable to make as it is to eat. Follow these steps, and you’ll be amazed at how easily you can create these festive treats.
Step 1: Prepare the Cookie Dough
First things first, preheat your oven to 350°F (175°C) and line your baking sheets with parchment paper. In a large bowl, cream together the 1 cup unsalted butter, softened, 3/4 cup granulated sugar, and 3/4 cup packed brown sugar until the mixture looks light and fluffy. This creaming step is crucial for a tender cookie. Next, beat in the 2 large eggs one at a time, followed by the 2 teaspoons vanilla extract. In a separate bowl, whisk together the 3 cups all-purpose flour, 1 teaspoon baking soda, and 1/2 teaspoon salt. Gradually add this dry mixture to the wet ingredients, mixing until just combined – don’t overmix! Finally, stir in the 1 cup chocolate chips for that delightful cookie surprise.
Step 2: Bake the Cookies
Drop rounded tablespoons of the cookie dough onto your prepared baking sheets, leaving a little space between them as they will spread. Bake them for 9 to 11 minutes. You’re looking for the edges to be a lovely golden brown, but the centers should still look slightly soft. Let the cookies cool on the baking sheets for about 5 minutes; this helps them firm up just enough so they don’t break when you move them. Then, carefully transfer them to a wire rack to cool completely. Patience here is key for the next decorating steps!
Step 3: Make the Vanilla Buttercream Frosting
While your cookies are cooling, let’s whip up the simple vanilla buttercream frosting. In a medium bowl, whisk together the 1 cup powdered sugar, 1/4 cup milk, and 1/2 teaspoon vanilla extract until it’s nice and smooth. If the frosting seems too thick, add a tiny bit more milk, a teaspoon at a time, until you reach a spreadable consistency. If it’s too thin, add a bit more powdered sugar. This frosting is the perfect canvas for our mummy designs.
Step 4: Decorate Your Mummy Cookies
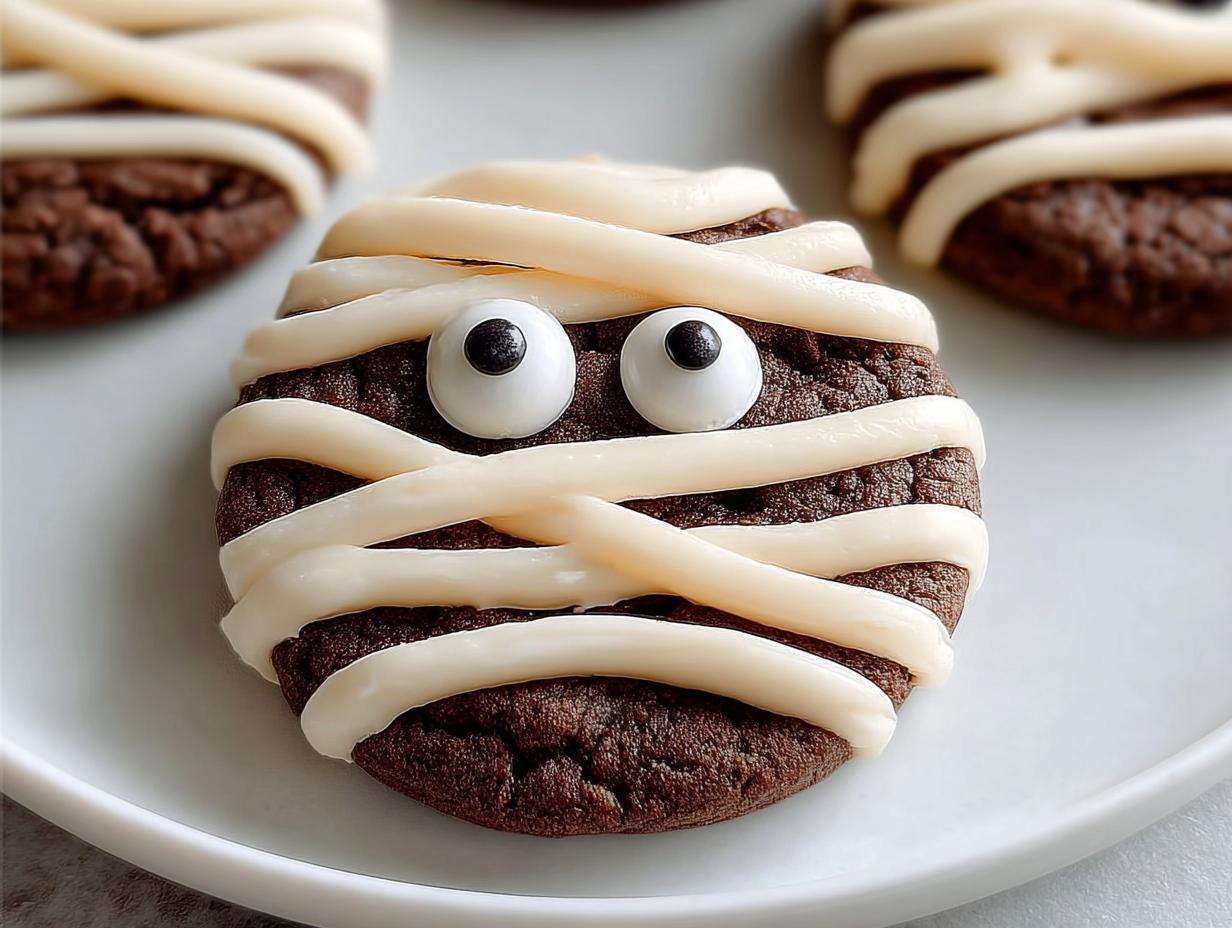
Once your cookies are completely cool – and I mean *completely* cool, otherwise, the frosting will melt off – it’s time for the fun part! Spread a thin, even layer of the vanilla buttercream frosting over the surface of each cookie. Now, to really get into how to decorate mummy cookies, you’ll want to create those mummy bandages. Using a piping bag fitted with a thin round tip (or even a fork!), pipe thin, squiggly lines of frosting across each cookie. Think of wrapping a mummy – go back and forth, crisscrossing slightly. Just be sure to leave a small gap or two where the eyes will go!
Step 5: Add the Candy Eyes
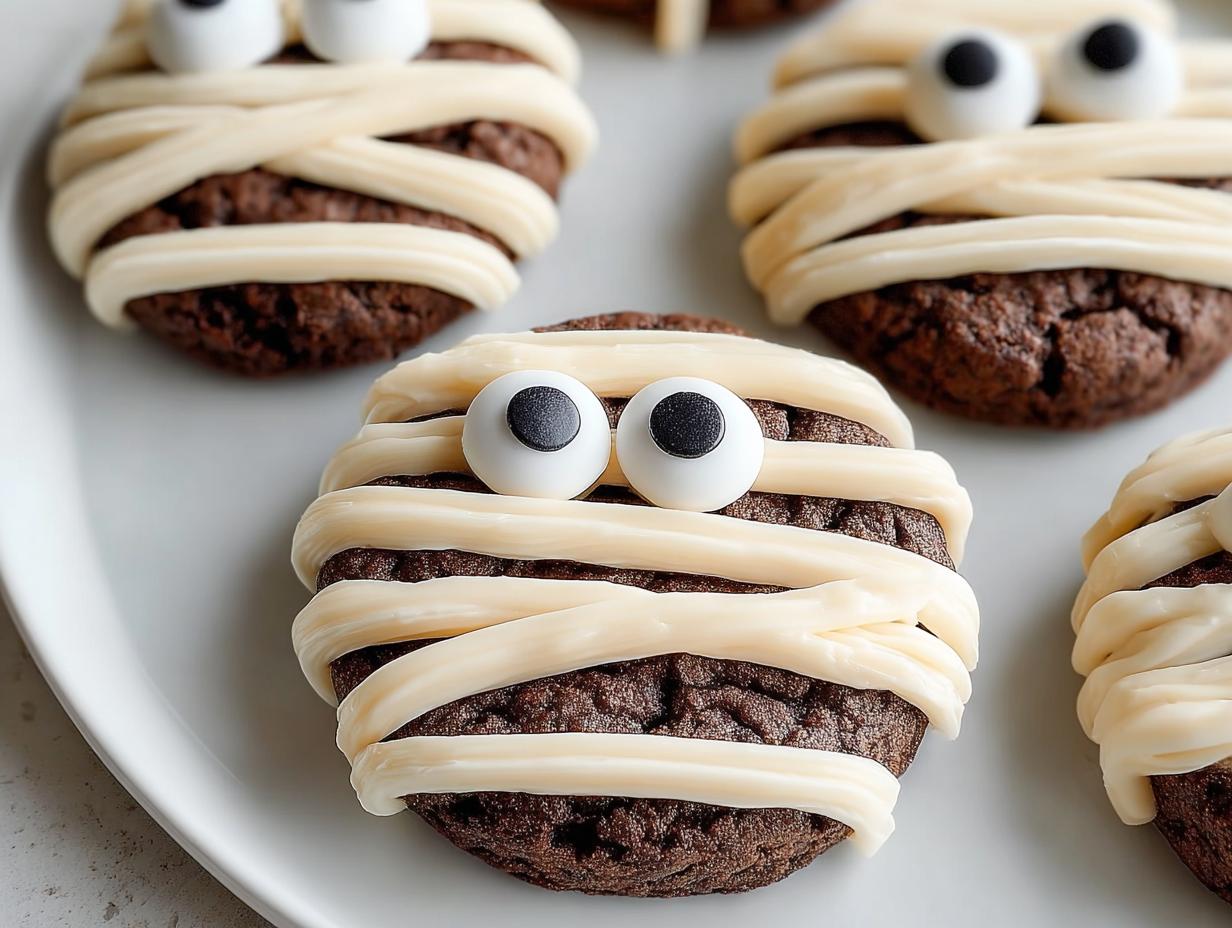
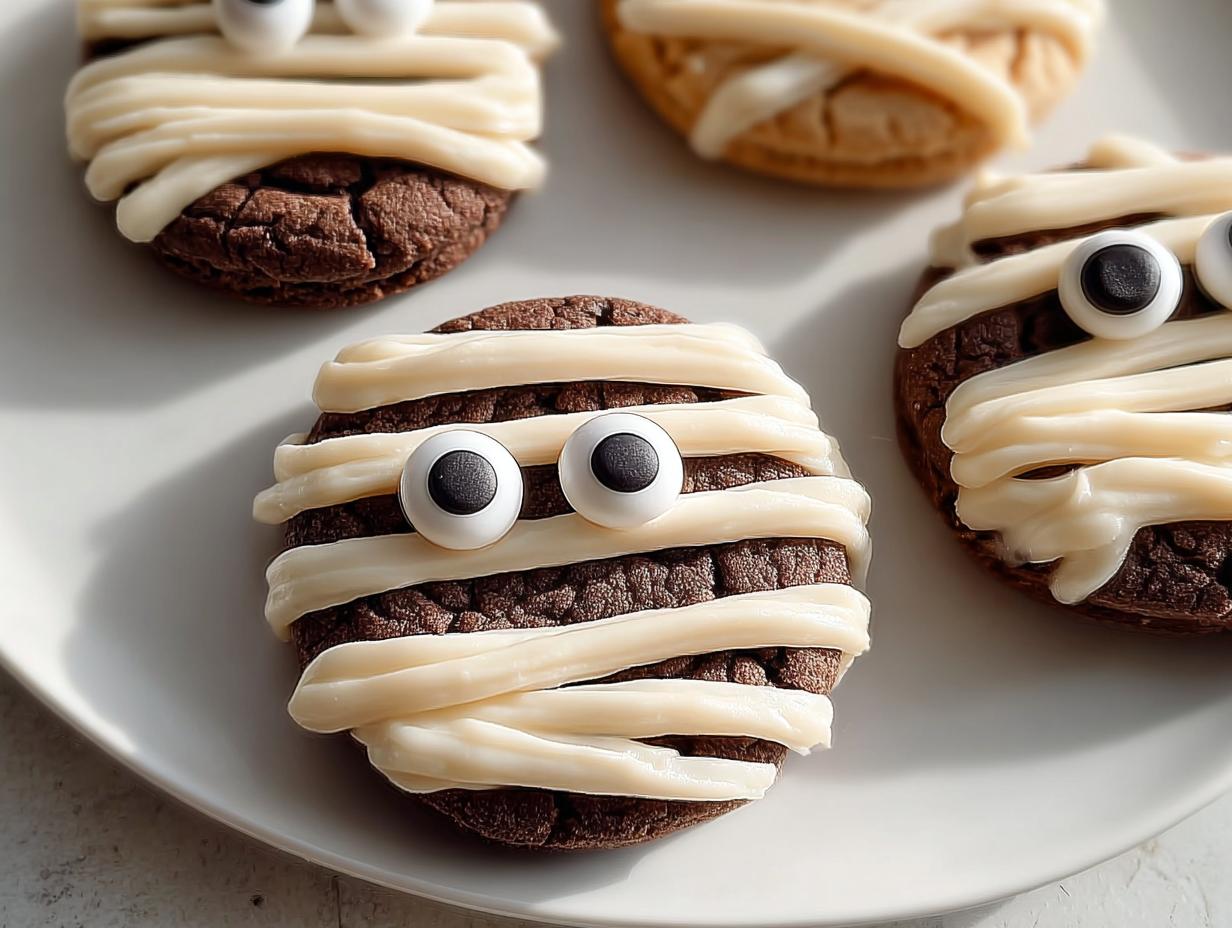
This is where your cookies truly come to life! Gently press two candy eyes into the frosting where you left those gaps. You can arrange them close together or a little farther apart for different expressions. Once all your little mummies have their eyes, let the frosting set for at least 15-20 minutes. This ensures the eyes stay put and the bandages hold their shape. Now you know how to decorate mummy cookies like a pro!
Pro Tips for the Best Halloween Mummy Cookies
Want to take your mummy cookies from good to spooktacular? I’ve picked up a few tricks over the years that make all the difference. These tips will help ensure your cookies are not only adorable but also perfectly delicious.
- Chill Your Dough: For thicker, less-spread cookies, chill the dough for at least 30 minutes before scooping. This helps maintain their shape.
- Frosting Consistency is Key: Make sure your frosting is thick enough to pipe but not so thick it’s unmanageable. A slightly thicker frosting will hold its shape better for the mummy bandages.
- Cool Cookies Completely: I can’t stress this enough! Frosting warm cookies is a recipe for a melty mess. Let them cool entirely before decorating.
What’s the secret to perfect Halloween Mummy Cookies?
The secret lies in the frosting consistency and the cookie texture. For perfectly moist cookies, don’t overbake them! For the frosting, aim for a slightly stiff texture so the mummy strips hold their shape. These are truly easy mummy cookies for Halloween when you nail these two points.
Can I make Halloween Mummy Cookies ahead of time?
Yes, you absolutely can! Bake and cool the cookies completely, then store them in an airtight container at room temperature for up to 2 days before decorating. You can also prepare the frosting a day in advance and store it in the fridge, bringing it back to room temperature and re-whipping before use. For more baking tips, check out this guide.
How do I avoid common mistakes with Halloween Mummy Cookies?
A common mistake is frosting warm cookies, which leads to a gooey mess. Always ensure they’re fully cooled! Another pitfall is frosting that’s too thin; it won’t create defined mummy bandages. Adjust with more powdered sugar if it’s too runny. For more baking advice, consider this resource.
Best Ways to Serve Halloween Mummy Cookies
Once your spooky creations are ready, it’s time to think about how to best present these festive treats. They’re perfect for a Halloween party dessert table, adding a playful touch. I love serving them alongside a cold glass of milk or a warm mug of apple cider, which makes for wonderfully complementary sides. For an extra touch of fun, consider arranging them on a platter surrounded by other spooky snacks. These festive mummy cookies Halloween pairings are sure to delight both kids and adults alike, creating a memorable and delicious Halloween celebration. You can find more party ideas here.
Nutrition Facts for Halloween Mummy Cookies
These adorable mummy cookies are a fun treat for Halloween! While they’re a delight to make and eat, it’s always good to know what you’re serving. Here’s a breakdown of the estimated nutritional information per cookie:
- Calories: 200
- Fat: 10g
- Saturated Fat: 6g
- Unsaturated Fat: 4g
- Trans Fat: 0g
- Carbohydrates: 27g
- Fiber: 1g
- Sugar: 25g
- Protein: 2g
- Sodium: 100mg
- Cholesterol: 30mg
Nutritional values are estimates and may vary based on specific ingredients used and exact serving sizes. For more information on understanding nutrition labels, you can refer to the FDA’s guidelines.
How to Store and Reheat Halloween Mummy Cookies
Keeping your spooky creations fresh is easy! After your homemade Halloween mummy cookies have completely cooled and the frosting has set, you’ll want to store them properly. For best results, place them in an airtight container. If you plan on enjoying them within a few days, they can be stored at room temperature for up to 3-4 days. For longer storage, these mummy cookies freeze beautifully! Wrap them individually in plastic wrap, then place them in a freezer-safe bag or container. They’ll stay good in the freezer for up to 3 months.
When you’re ready to enjoy your frozen Halloween mummy cookies, simply transfer them from the freezer to the refrigerator overnight to thaw. Avoid reheating them in the oven or microwave, as this can melt the frosting and make the cookies soft. Enjoy your perfectly preserved, spooky treats! For more storage tips, see this article.
Frequently Asked Questions About Halloween Mummy Cookies
Can I use different types of cookies for my mummy design?
Absolutely! While this recipe provides a delicious chocolate chip base, you can adapt this spooky mummy cookie tutorial to sugar cookies or even shortbread. The key is having a sturdy cookie that can hold the frosting. Just ensure the cookie is completely cooled before decorating.
What can I use if I don’t have candy eyes?
No candy eyes? No problem! You can create mummy eyes using small dots of black frosting or even mini chocolate chips. Another fun idea is to reserve a small amount of the cookie dough before adding chocolate chips, bake those tiny balls, and use them as eyes. It’s all about getting creative with your homemade Halloween mummy cookies!
How do I get the mummy bandage effect just right?
The trick to realistic mummy bandages is a consistent piping technique. Use a piping bag with a small, circular tip and pipe thin, overlapping lines across the cookie. Vary the direction slightly to mimic real bandages. If you don’t have a piping bag, a fork works surprisingly well for creating a similar effect. This part of the spooky mummy cookie tutorial is where your creativity truly shines!
Are these Halloween Mummy Cookies suitable for a bake sale?
Definitely! These cookies are not only visually appealing but also taste fantastic, making them a perfect addition to any bake sale. Their fun, festive theme is a huge draw for both kids and adults. Just make sure they are fully cooled and the frosting is set before packaging them up.
Variations of Halloween Mummy Cookies You Can Try
While the classic chocolate chip mummy cookie is amazing, don’t be afraid to get creative! These variations offer new flavors and dietary options for your spooky treats. Exploring these ideas can lead to some truly creative mummy cookie designs that everyone will love.
- Gluten-Free Mummies: Simply swap out the all-purpose flour for a good quality gluten-free baking blend. You might need to adjust the liquid slightly, but the mummy decorating process remains the same.
- Dark Chocolate Delight: For a richer flavor, use dark chocolate chips instead of semi-sweet in the cookie dough. You could even use a dark chocolate frosting base for an extra decadent mummy.
- Vegan Mummies: Make these cookies vegan by using plant-based butter, a flax egg (1 tablespoon flaxseed meal mixed with 3 tablespoons water, let sit for 5 minutes), and a dairy-free milk for the frosting. Ensure your chocolate chips and candy eyes are also vegan-friendly.
- Lemon Zest Surprise: Add the zest of one lemon to the cookie dough for a bright, citrusy twist that pairs surprisingly well with the chocolate and vanilla frosting.

Halloween Mummy Cookies: 5 Easy Steps
- Total Time: 30 minutes
- Yield: 24 cookies 1x
- Diet: Vegetarian
Description
Easy and spooky Halloween Mummy Cookies recipe. These chocolate cookies are topped with vanilla buttercream frosting and candy eyes, perfect for a festive treat.
Ingredients
- 1 cup unsalted butter, softened
- 3/4 cup granulated sugar
- 3/4 cup packed brown sugar
- 2 large eggs
- 2 teaspoons vanilla extract
- 3 cups all-purpose flour
- 1 teaspoon baking soda
- 1/2 teaspoon salt
- 1 cup chocolate chips
- 1 cup powdered sugar
- 1/4 cup milk
- 1/2 teaspoon vanilla extract
- Candy eyes
Instructions
- Preheat your oven to 350°F (175°C). Line baking sheets with parchment paper.
- In a large bowl, cream together the softened butter, granulated sugar, and brown sugar until light and fluffy.
- Beat in the eggs one at a time, then stir in the vanilla extract.
- In a separate bowl, whisk together the flour, baking soda, and salt.
- Gradually add the dry ingredients to the wet ingredients, mixing until just combined.
- Stir in the chocolate chips.
- Drop rounded tablespoons of dough onto the prepared baking sheets.
- Bake for 9-11 minutes, or until the edges are golden brown. Let cool on the baking sheets for a few minutes before transferring to a wire rack to cool completely.
- While the cookies cool, prepare the frosting. In a medium bowl, whisk together the powdered sugar, milk, and vanilla extract until smooth and creamy. Add more milk if needed to reach desired consistency.
- Once the cookies are completely cool, spread a thin layer of frosting over each cookie.
- Using a piping bag with a thin round tip or a fork, pipe thin strips of frosting across each cookie to resemble mummy bandages. Leave a small gap for the eyes.
- Place two candy eyes on each cookie.
- Allow the frosting to set before serving your Halloween Mummy Cookies.
Notes
- For a fudgier cookie, use dark chocolate chips.
- You can use store-bought frosting if you are short on time.
- Get creative with different sizes and types of candy eyes.
- These mummy cookies are best enjoyed within 3-4 days.
- Prep Time: 20 minutes
- Cook Time: 10 minutes
- Category: Desserts
- Method: Baking
- Cuisine: American
Nutrition
- Serving Size: 1 cookie
- Calories: 200
- Sugar: 25g
- Sodium: 100mg
- Fat: 10g
- Saturated Fat: 6g
- Unsaturated Fat: 4g
- Trans Fat: 0g
- Carbohydrates: 27g
- Fiber: 1g
- Protein: 2g
- Cholesterol: 30mg
Keywords: Halloween Mummy Cookies, Halloween mummy cookie recipe, Easy mummy cookies for Halloween, How to make mummy cookies, Homemade Halloween mummy cookies, Spooky mummy cookie tutorial, Best mummy cookies Halloween, Simple Halloween mummy cookie ideas, DIY mummy cookies for kids, Mummy-shaped Halloween cookies, Halloween monster cookies mummy, Creative mummy cookie designs, Ghost mummy cookies recipe, Halloween cookie decorating mummy, Spooky treats mummy cookies, Mummy cookies with candy eyes, Halloween baking mummy cookies, Best Halloween mummy cookie recipe, How to decorate mummy cookies, Festive mummy cookies Halloween



Leave a Reply